GRP boats are extremely robust and durable. Nevertheless, damage can occur due to collisions or rough mooring maneuvers. In this case, good advice is expensive! But: Almost any damage can be repaired. So first determine the degree of damage and then determine the strategy for repair. Simple repairs include filling holes or repairing minor, superficial cracks.
These damages can be repaired by anyone. Structural damage, on the other hand, requires rebuilding load-bearing structures from both sides of the laminate. With all the additional work, such as filling, sanding and painting, several days of work can be involved here. As a rule, this is a job for professionals.
Before we get started, a few thoughts on epoxy or polyester resin. Most ships have been built with polyester resin and thus repairs with polyester resin are quite reasonable and above all possible. Equally possible here, of course, are epoxy resins as long as the polyester resin is fully cured. On the other hand, ships built with epoxy resin can only be repaired with polyester resin to a limited extent.
The reason for this is the different elongation at break. Standard polyester resins have an elongation of 2–3%, which is significantly lower than EP resins, which have an elongation of 4–7%. If you repair with a standard polyester, there will be cracks in the repaired area which can continue into the previously undamaged laminate. Only special types such as some iso-NPG resins or vinyl ester resins will work here. If in doubt, of course, take an epoxy resin to repair an epoxy ship.
Basic properties of the hardened laminate
Polyester resin | Epoxy resin |
|---|---|
Lower elongation at break | Higher elongation at break |
High UV and weather resistance | Yellowing under UV influence |
Stresses, as shrinkage appears in solid (gelled) phase | Low stress, as shrinkage takes place in liquid phase |
Processing
Polyester resin | Epoxy resin |
|---|---|
Clearly perceptible odor of styrene | Almost odorless |
Fast hardening | Slow hardening |
Can be overlaminated for a long time | Before overlaminating must be ground and cleaned |
Reinforcing fibers
Polyester resin | Epoxy resin |
|---|---|
Glass mats | Glass fabrics |
Glass fabrics | Glass scrims |
Glass scrims | Carbon fiber walkways |
— | Carbon fiber scrim |
Costs
Polyester resin | Epoxy resin |
|---|---|
In combination with glass mat extremely cost-effective | Epoxy with fabric and scrim are quite expensive raw materials |
1. Simple repairs of GRP boats
1.1 Small holes
In the simplest case, only a hole from a stripped screw needs to be filled. There are two basic cases here: a through hole or a so-called blind hole. The procedure is the same in both cases with one exception. A through hole must first be plugged on one side. This is done with a simple plug.
Working steps:
- Drill or mill out to load-bearing laminate
- Shank the hole edge with a countersink bit
- In the case of through holes, use a plug. Then fill hole with fiber filler (see appendix)
- Smooth surface with Japan filler and allow fiber filler to harden
- After hardening, sand, fill and varnish.
1.2 Large holes
Large holes are treated similarly to smaller ones. Only the method of plugging looks different.
Working steps:
- Milling out or sanding down to the load-bearing laminate.
- Sanding the back side around the hole (approx. 5cm wide)
- For small holes, bevel the edge with countersink, for large holes, bevel the edge with sandpaper
- Soak glass fabric with resin/hardener mixture and place over the hole on the reverse side. Laminate to the edge without bubbles.
- After curing, apply fiber filler and smooth.
Sand, fill and paint fiber filler after complete curing.
Repairs to structural components
The use of fiber filler is not recommended for repairs to structural components, especially if the laminate is made of fabric or scrim. In this case, only the use of fabrics/laid scrims and possibly mats can be considered.
2. Repairs to structural components
2.1 Filling large, continuous holes in structural components
- Milling or grinding out the hole to the load-bearing laminate.
- Bevel the laminate at a ratio of 1:10. A 10mm thick laminate is beveled to 100mm around the hole.
- Cut fabric and/or mats, cutting 2 layers so that they are approximately 5mm larger than the hole.
- Pre-soak the two largest fabric sections with resin and place them on the hole from both sides. Press the laminate pieces well in the edge area and deaerate. Allow to cure.
- As soon as the laminate pieces are slightly hardened, build up the rest of the laminate. Start with the largest pieces. Finally, laminate the smallest pieces. Ventilate each layer well.
- Allow the repair area to cure and then sand smooth. Fill and varnish.
2.2 Filling large, continuous holes in structural components
It is still quite easy to repair a hole that is accessible from both sides, but for damage that is only accessible from one side, a little trick must be used. In principle, you use a “plug”, but here it is rather a thin plate.
Working steps
- Cut a layer of tissue about 10–15 mm larger than the hole diameter. Soak it with resin/hardener and let it cure.
- Prepare the hole as under 2.1
Make a hole in the center of the cured laminate layer and insert a wire through it. To prevent the wire from slipping through, bend it over and fix it with some SciGrip. - Apply SciGrip to the edge of the laminate piece, put the “plug” through the hole and pull with the wire against the inaccessible back side. After the adhesive has cured, pinch off the wire.
- Now the hole can be filled with laminate as already described in 2.1.
2.3 Filling large, continuous holes in sandwich laminates
Basically, the procedure here is the same as for the previous damaged areas. Unlike before, only the sandwich has to be restored here, so some foam or balsa wood has to be used. This is done with a light sandwich adhesive. Then the laminate is built up.
Working steps
- Milling or grinding out the hole to the sandwich. Again, make sure to chamfer the laminate at a ratio of 1:10.
- Cut out damaged sandwich with hole saw.
- Cut out a piece from a sheet of (original) core material with hole saw.
- Insert the “plug” with a little sandwich glue. Wipe off escaping glue.
- Cut pieces of glass cloth and/or glass mat so that the largest is about 4–5mm larger than the ground out area. The smallest should correspond approximately to the diameter at the base of the hole (i.e. at the sandwich core).
- After the glue has cured, you can now laminate. Start again with the largest piece.
- Allow to cure and then sand the surface smooth. Fill and paint.
3. Osmosis removal
3.1 What is osmosis?

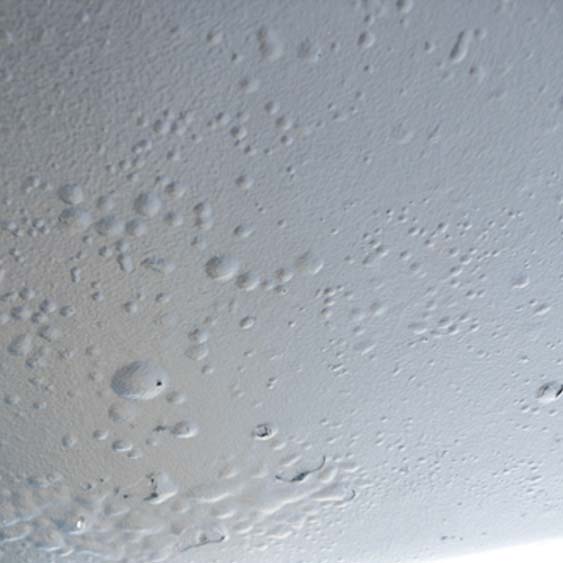
Osmosis damage is usually due to poor workmanship and/or old age of the ship. The cause is usually air bubbles in the laminate (poor ventilation during production) or in the gelcoat. Due to a concentration gradient, these cause the water to diffuse through the plastic into the bubble. There is always “less” water in the plastic than in the surrounding sea or lake. Therefore, such a bubble will fill with water and continue to grow until it bursts.
In the picture on the right, the bubble would be on the right and the surrounding water (the sea) on the left. The concentration gradient creates the osmotic pressure, which ultimately causes more and more water to enter the bubble. Such damage is not easily eliminated. Depending on the severity of the “infestation”, a professional may be required. Nevertheless, we would like to describe the basic procedure of a restoration.
3.2 Restoration of osmosis damage
In the simplest case, a few bubbles are found in the gelcoat. In the worst case, the entire hull is covered with osmosis bubbles, which are also located in the laminate. The first thing to do is to determine where the osmosis bubbles are located. To do this, prick several bubbles
As a rule, water runs out. If the bubble is in the gelcoat, there are no glass fibers (case 1). If glass fibers are found, the laminate is damaged (case 2). The leaking water usually smells like vinegar or even like almonds. In both cases, these are decomposition products of some components of the plastic. In any case, each of these bubbles must be dried well.
Case 1: If only the gelcoat is damaged, the effort is somewhat less. The gelcoat is sanded down to the laminate, followed by the buildup of a protective layer.
Working steps:
- Sanding the gelcoat down to the laminate
- Check laminate for moisture content (should be below 15%). If the moisture content is too high, the hull must be dried.
- Apply a layer of laminate (160 g/m2 fabric with AMPRO resin) and let it cure.
- Filling of the hull with S‑FAir 600, followed by sanding.
- Seal with Hempels Light Primer (5–6 layers)
- Build up new underwater coating
Case 2: If the laminate is damaged, there is a lot of work to be done. In this case, not only must the gelcoat be removed, but the laminate must be stripped down to the sound material. Then the laminate has to be rebuilt.
Working steps:
- Removal of the gelcoat and the damaged laminate. As a rule, the hull is blasted in such cases. Sanding or planing damages too much healthy material.
- Measure hull moisture. If more than 15%, dry the hull.
Depending on the laminate layers removed, several layers of laminate must be built up. For this purpose, the blasted hull is filled. Allow to cure. - Laminate build-up (at least 1 layer of glass mat or glass fabric). Allow to cure.
- Filling and sanding of the surface.
- Apply the sealant.
This brief description may give the wrong impression that this is a fairly simple task. For those who want to perform this task themselves, please note the following:
Sanding 1 m² of osmosis damaged laminate means about 1–2 hours of work (if the laminate is damaged only about 2mm deep). So for a 30‘ ship between 15 and 40 hours. The subsequent drying process takes several weeks (much less in an appropriate annealing chamber). Filling and sanding again take about 15 — 40 hours (the inexperienced must usually fill and sand much more often until the result is convincing).
Then the laminate is rebuilt, which takes about 5–20 hours. It follows again spatula and sanding with another 10–20 hours and the final application of a sealant. Depending on the material between 2 and 6 hours. This quickly adds up to 100 hours of work or more, which means about 3–4 months of work for the hobbyist. Mind you, 2–3 hours of work every day after the actual work.
Drying a hull usually requires the use of annealing chambers or at least heat blown. Both are rather expensive options. The recommendation here can therefore only be to have this work done by a professional. We will be happy to put you in touch with a leading renovation company. If you still want to do the renovation yourself, please contact us. We will work out a concept for your ship together with you.
4. Necessary materials
All necessary materials can be found in our online store. If you have any questions or suggestions, please contact us!
Polyester resin | Epoxy resin |
|---|---|
Moisture meter Skipper:
An indispensable device when renovating a ship. The device offers 3 different measuring ranges and determines the moisture content via 2 soft rubber electrodes. | Moisture meter Skipper:
An indispensable device when renovating a ship. The device offers 3 different measuring ranges and determines the moisture content via 2 soft rubber electrodes. |
— | Fiber filler: To fill holes or deep damage in non-load bearing laminates, fill the AMPRO laminating resin with glass beads and Colloidal Silica. Add 3% Colloidal Silica to the AMRPROTM laminating resin/hardener mixture. Stir in well. Glass beads are then stirred in until a creamy, firm and easily spatulaable mass is obtained. The putty must be applied within about 15 minutes. |
— | Fine filler S/Fair 600: Alternatively, a ready-made filler can be used. The S/Fair 600 can be applied buttery and easily sanded. The maximum layer thickness is 35 mm. |
VE679P laminating resin: VE laminating resin for laminating in underwater and above-water applications. Thixotropic VE/DCPD system with excellent impregnation properties. Gel time around 35 minutes. Lloyd ́s approval. Post-curing is recommended to achieve the best possible weathering and water resistance. Post-curing should be carried out at a minimum of 60°C for one hour per mm of laminate applied. | Ampro laminating resin: EP laminating resin for all repair work in the overwater and underwater hull. The resin is characterized by good fiber impregnation and no formation of amine blush. With three different hardeners, processing times between 35 min and 4 hours are possible. Post-curing is recommended to achieve the best possible weather and water resistance. It is urgently required when using the slow and extremely slow hardeners. |
Hempel Light Primer: Light Primer is applied as the last coat before applying an antifouling. This can be done with a roller or with a spray gun (add thinner up to 20%). Applying two coats (about 100 g/m2) gives an excellent adhesion primer for the antifouling. If 5–6 coats (350–400 g/m2) are applied, a barrier layer is obtained to prevent re-osmosis. | Hempel Light Primer: Light Primer is applied as the last coat before applying an antifouling. This can be done with a roller or with a spray gun (add thinner up to 20%). Applying two coats (about 100 g/m2) gives an excellent adhesion primer for the antifouling. If 5–6 coats (350–400 g/m2) are applied, a barrier layer is obtained to prevent re-osmosis. |


